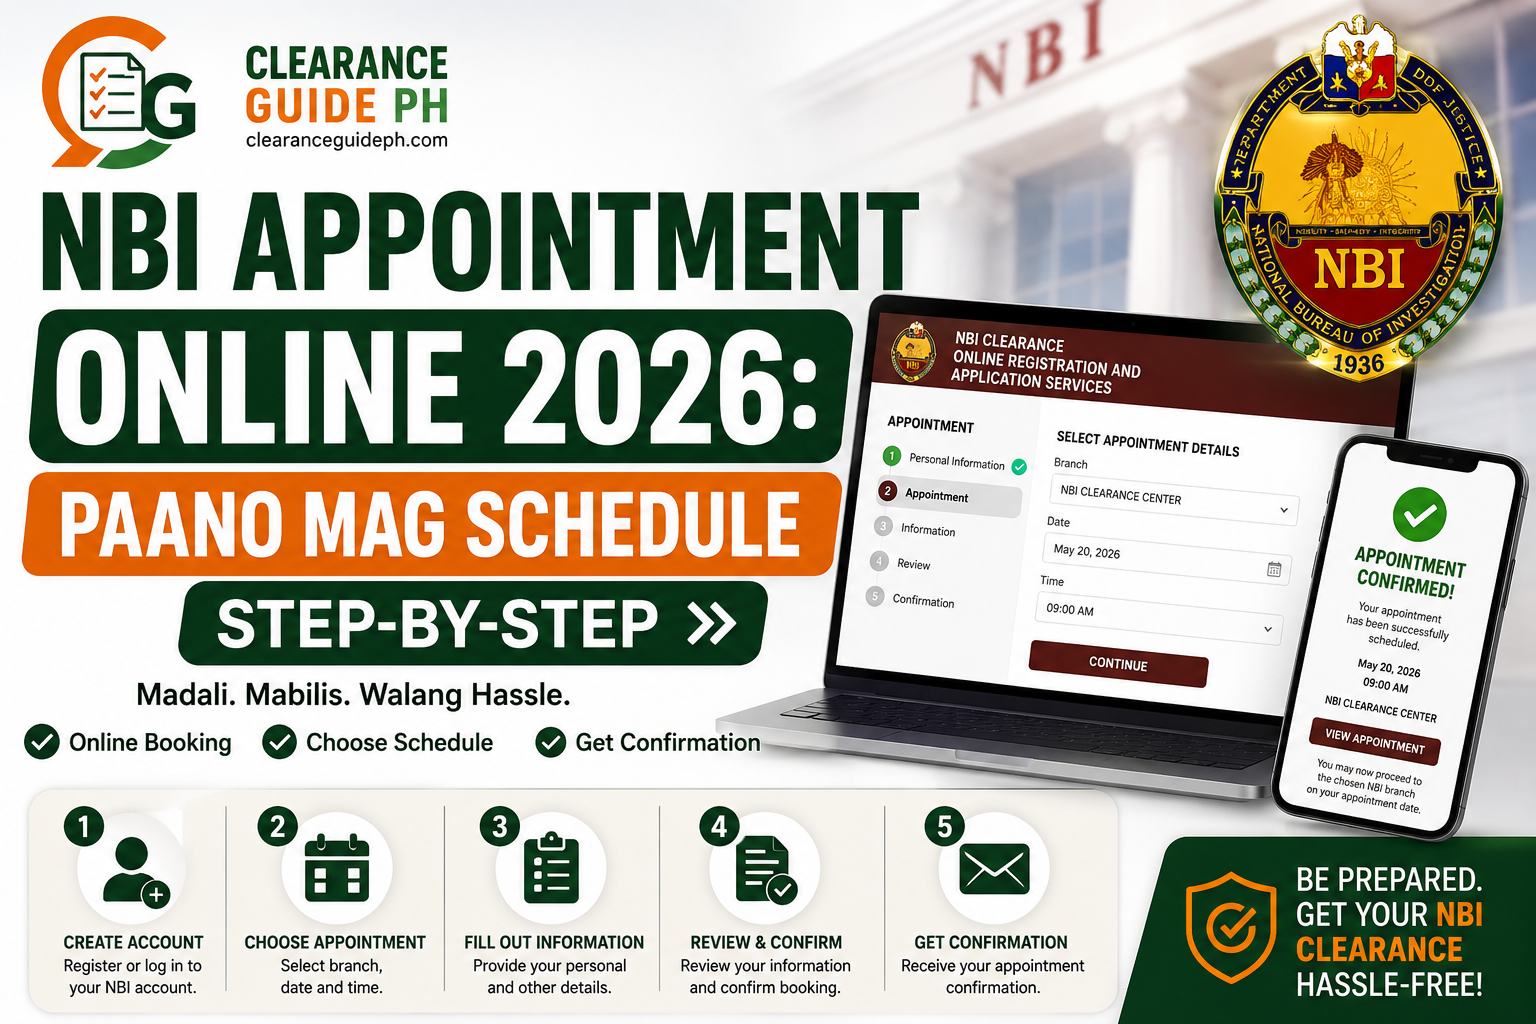
Paano Mag Schedule ng NBI Appointment Online 2026: Madaling Step-by-Step Guide
Kung kukuha ka ng NBI Clearance Online, isa sa pinaka-importanteng step ay ang pagkuha ng NBI appointment online. Dito mo pipiliin kung saang NBI branch ka pupunta, anong date ang available, at kung morning or afternoon schedule ang gusto mo.
Hindi sapat na gumawa ka lang ng NBI online account. Kailangan mo pa ring pumili ng branch, appointment date, time slot, at payment option bago ka pumunta sa branch. Kapag wala kang appointment or reference number, puwede kang ma-delay or hindi ma-accommodate, depende sa branch policy and current system procedure.
Sa guide na ito, tuturuan ka namin kung paano mag-schedule ng NBI appointment online in 2026, kasama ang tips para makakuha ng mas mabilis na slot at maiwasan ang common mistakes.
Important note: ClearanceGuidePH.com is an independent guide website. Hindi ito official website ng National Bureau of Investigation. Always verify final requirements, fees, schedules, and procedures through the official NBI website or official NBI Clearance portal. The official NBI website lists an “Apply NBI Clearance Online” option and Citizen’s Charter resources.
Quick Answer: Paano Mag Schedule ng NBI Appointment Online?
Para mag-schedule ng NBI appointment online, mag-log in sa iyong NBI Clearance account, piliin ang Apply for Clearance, i-confirm ang valid ID na gagamitin mo, pumili ng NBI branch, appointment date, at time slot, then piliin ang payment method. Pagkatapos nito, i-save ang reference number at magbayad gamit ang selected payment channel.
Simple process:
- Mag-log in sa NBI Clearance online account
- I-check kung complete ang personal information
- Click Apply for Clearance
- Piliin ang valid ID na dadalhin
- Pumili ng preferred NBI branch
- Pumili ng available date
- Pumili ng morning or afternoon time slot
- Pumili ng payment method
- I-save ang reference number
- Magbayad at i-save ang proof of payment
Ano ang NBI Appointment Online?
Ang NBI appointment online ay schedule na kinukuha mo sa NBI Clearance online system bago ka pumunta sa branch. Sa appointment na ito nakalagay kung saan at kailan ka pupunta para sa biometrics, photo capture, fingerprint scanning, verification, and releasing.
Sa madaling salita, ang online appointment ang nagsisilbing reservation mo sa NBI branch. Kapag may appointment ka, mas organized ang process dahil may selected branch, date, and schedule ka na.
Based on current online walkthroughs of the NBI clearance portal, appointment scheduling normally happens after account registration and applicant information, then the applicant selects a branch, date/time, and payment method before going to the branch.
Kailan Ka Dapat Mag Schedule ng NBI Appointment?
Mag-schedule ka ng NBI appointment kapag:
- Kailangan mo ng NBI Clearance for job application
- Need mo ng clearance for visa or travel
- Required ito for government transaction
- Kukuha ka ng clearance for business requirement
- Magre-renew ka pero kailangan pa rin ng branch appearance
- First-time job seeker ka
- May deadline ka sa employer or agency
Pro Tip:
Huwag mag-schedule last minute. Kung may deadline ka sa employer, agency, or school, mag-book ka nang mas maaga. Kapag nagka-HIT ka, hindi automatic na makukuha mo agad ang clearance.
Step-by-Step Guide: Paano Mag Schedule ng NBI Appointment Online 2026
Step 1: Mag-Log In sa Iyong NBI Clearance Account
Unang step ay mag-log in sa iyong NBI Clearance online account. Gamitin ang registered email address and password mo.
Kung first time mo pa lang, kailangan mo munang gumawa ng account at kumpletuhin ang personal information. Kung may account ka na dati, gamitin ang existing login details mo.
Tip:
Huwag gumawa ng maraming account kung hindi kailangan. Mas okay na gamitin ang existing account para hindi magdoble ang records mo.

Step 2: I-Check ang Personal Information Mo
Bago ka mag-apply for clearance appointment, siguraduhin muna na tama ang details mo sa account.
Double-check:
- Full name
- Middle name
- Surname
- Birthdate
- Birthplace
- Gender
- Civil status
- Address
- Mobile number
- Email address
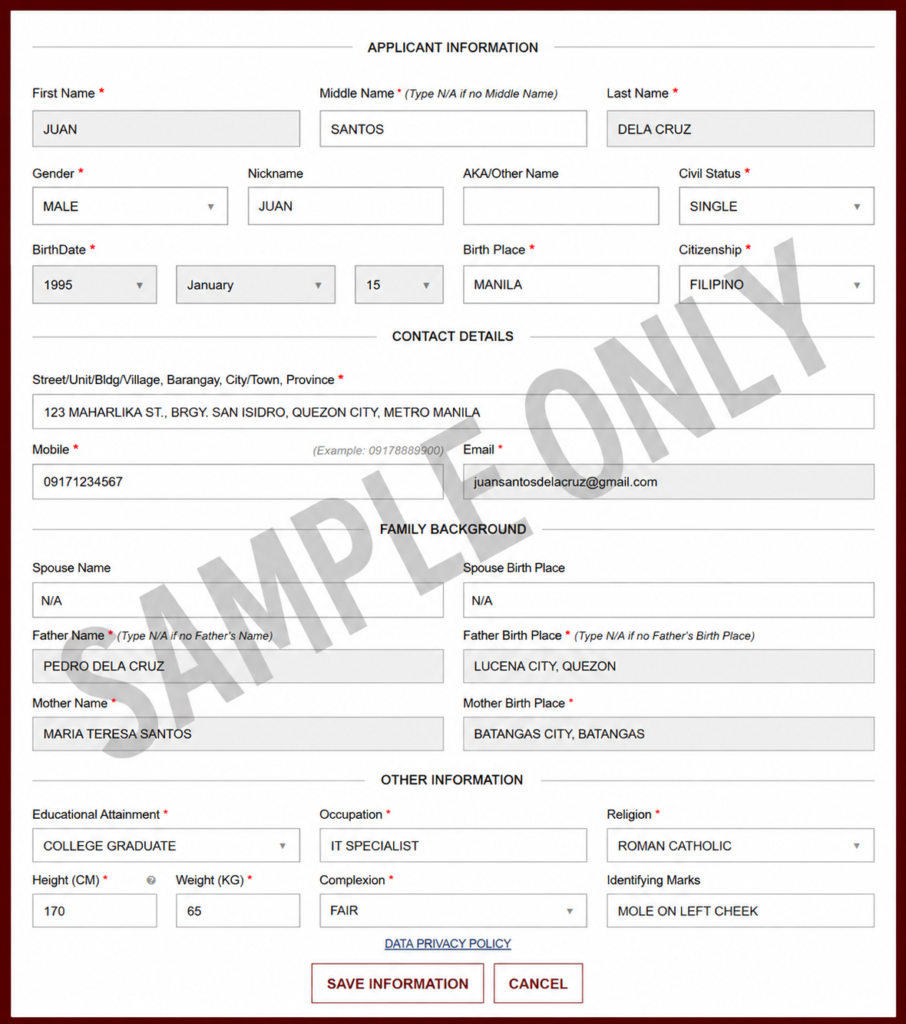
Kung may mali sa information mo, ayusin muna bago mag-proceed. Mas hassle kapag sa branch mo pa lang mapansin na may mali sa name or birthday mo.
Example:
Kung sa valid ID mo ay Juan Santos Dela Cruz, huwag mong ilagay sa application na Juan S. Cruz kung hindi iyon ang official format sa ID mo.
Step 3: Click “Apply for Clearance”
Pag complete na ang profile mo, hanapin ang button or option na Apply for Clearance.
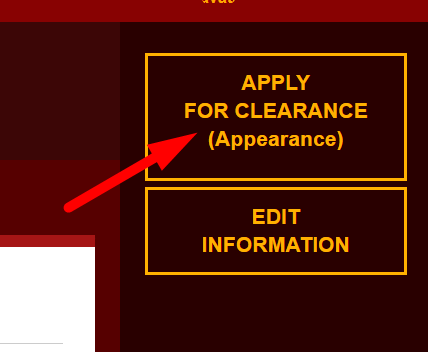
Dito magsisimula ang actual process ng pagkuha ng NBI appointment. Usually, hihingin ng system kung anong valid ID ang dadalhin mo sa branch.
Important:
Ang valid ID na ilalagay mo sa system should be the same ID na dadalhin mo sa appointment day.
Step 4: Piliin ang Valid ID na Dadalhin Mo
Sa appointment process, maaaring hingin ng system ang valid ID type and ID number. Piliin ang ID na sure kang madadala mo.
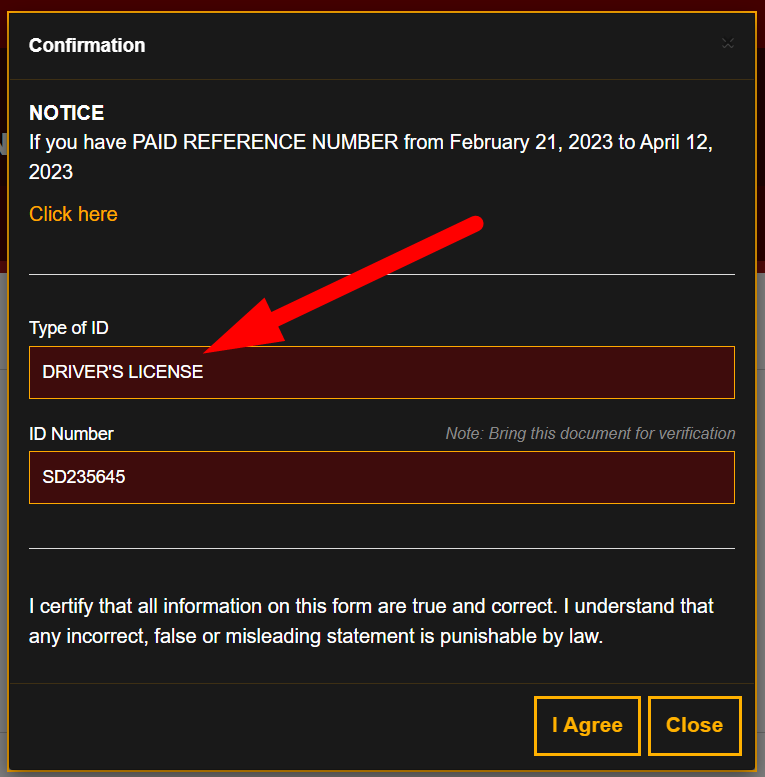
Good options include:
- Passport
- Driver’s License
- UMID
- PRC ID
- National ID
- Postal ID
- Voter’s Certification
- SSS ID
- GSIS ID
- PhilHealth ID
Kung hindi ka sure kung accepted ang ID mo, basahin muna ang related guide dito NBI Clearance requirements.
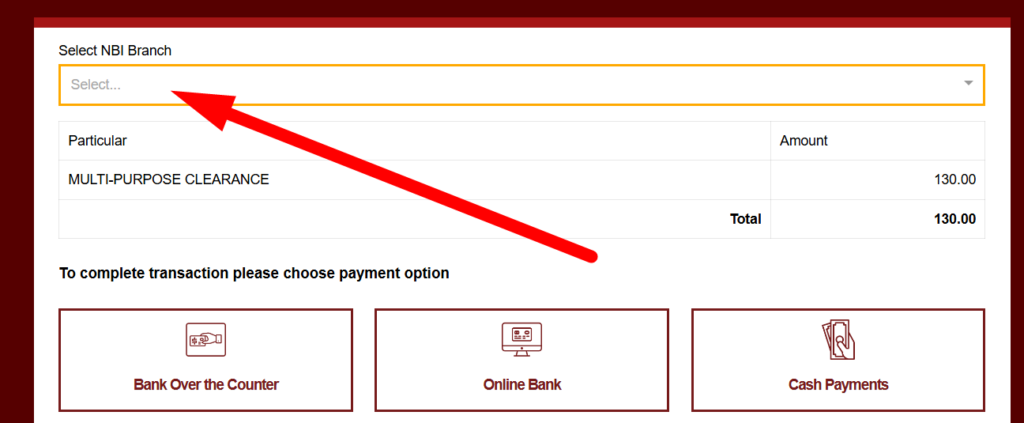
Step 5: Pumili ng Preferred NBI Branch
Next, pipili ka ng NBI branch location kung saan ka pupunta for biometrics and verification.
Piliin ang branch based sa:
- Lapit sa bahay
- Lapit sa workplace
- Available appointment slots
- Travel time
- Parking or commute convenience
- Expected crowd
- Urgency ng schedule mo
Practical Tip:
Huwag lang isang branch ang tingnan. Kung fully booked ang nearest branch, check nearby cities or mall branches. Minsan mas mabilis makakuha ng slot sa branch na medyo mas malayo pero hindi crowded.
Step 6: Pumili ng Appointment Date
After choosing the branch, lalabas ang available dates. Piliin ang date na kaya mong puntahan.
Kung may calendar view ang portal, tingnan kung alin ang available at alin ang fully booked. The exact display may change depending on the current portal version, so follow what appears on your screen.

Best tip para mabilis na slot:
Check multiple branches. Kung urgent ang clearance mo, huwag mag-stick sa isang branch lang.
Step 7: Pumili ng Time Slot
After date selection, pipili ka ng time slot. Usually, may morning and afternoon options, depende sa branch availability.
Morning Schedule
Mas okay ito kung gusto mong matapos nang maaga. Mas maganda rin ito kung may ibang lakad ka pa sa hapon.
Afternoon Schedule
Good option ito kung galing ka pa sa work, school, or malayo ang biyahe mo. Pero expect na possible mas marami nang tao depending sa branch.
Pro Tip:
Kung kaya mo, piliin ang morning schedule on a weekday. Usually mas manageable ang lakad kapag maaga ka, lalo na kung may pila or system delay.
Step 8: Piliin ang Payment Method
Pag nakapili ka na ng branch, date, and time, pipili ka naman ng payment method.
Common payment channels may include:
- GCash
- Maya
- 7-Eleven CLiQQ
- Bayad Center
- ECPay partners
- Online banking
- Other payment partners shown in the portal
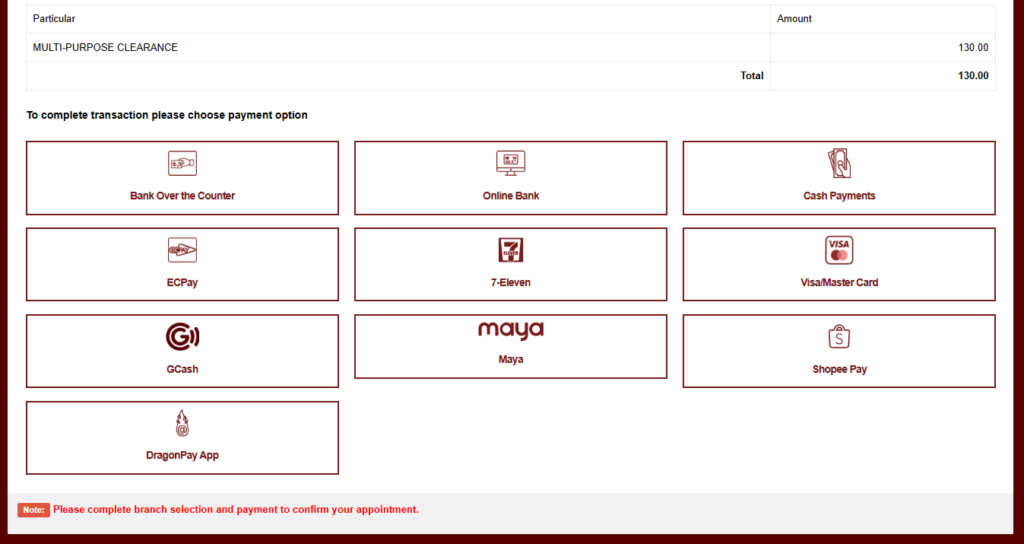
Always follow the payment options shown in your actual NBI transaction page because available channels may change.
Step 9: I-Save ang Reference Number
Pagkatapos mong pumili ng payment method, magge-generate ang system ng reference number.
This is very important.
Kailangan mo ang reference number para:
- Makapagbayad
- Ma-confirm ang transaction
- Ma-check ang appointment
- Maipakita sa branch kung kailangan
- Ma-resolve ang payment issue kung may delay
Important:
Screenshot agad ang reference number. Huwag magbayad hangga’t hindi mo na-save ang reference number.
Step 10: Magbayad ng NBI Clearance Fee
After makuha ang reference number, magbayad gamit ang selected payment channel.
Kung GCash or Maya ang ginamit mo, screenshot ang successful payment confirmation. Kung 7-Eleven or Bayad Center, itago ang printed receipt.
The final amount may include payment or service charges depending on the channel. Always follow the amount shown in the official portal or payment page at the time of transaction.
Step 11: I-Check Kung Paid na ang Status
Pagkatapos magbayad, bumalik sa NBI account mo and check kung updated na ang transaction status.
Possible na hindi agad mag-reflect ang payment. Kung pending pa rin after payment, huwag agad magbayad ulit. Wait first, then check again.
Kung matagal pa rin pending:
- Check kung tama ang reference number
- Confirm kung successful ang payment
- Save receipt or screenshot
- Contact payment provider if needed
- Ask assistance from NBI branch or support if unresolved
Step 12: I-Save or I-Print ang Appointment Details
Before your appointment day, make sure may copy ka ng:
- Reference number
- Appointment date
- Branch
- Payment receipt
- Valid ID details
- Screenshot ng transaction status
Mas safe kung may printed copy ka. Pero kung wala, make sure malinaw ang screenshots mo sa phone.
Practical Tip:
Ilagay ang screenshots sa isang phone folder para madali mong mahanap sa branch.
Tips Para Makakuha ng Mabilis na NBI Appointment Slot
1. Check Multiple Branches
Kung fully booked ang nearest branch, try nearby areas. Minsan mas mabilis makakuha ng slot sa ibang branch kahit mas malayo nang kaunti.
2. Try Weekday Schedules
Weekdays are often better than peak days. Kung may flexible schedule ka, try Tuesday to Thursday.
3. Choose Morning Slots
Morning schedule is usually better kung gusto mong matapos nang maaga. Kahit may pila, mas may time ka pa to resolve issues.
4. Avoid Last-Minute Booking
Kung kailangan mo ang clearance next week, huwag bukas ka pa lang mag-book. Maglaan ng extra days in case may HIT or system delay.
5. Prepare Valid ID Before Booking
Huwag ka munang mag-book kung hindi ka sure sa valid ID mo. Sayang ang appointment kung ma-reject ka sa branch.
6. Use Stable Internet
Kapag nagbo-book ng appointment, gumamit ng stable internet para hindi ka ma-disconnect habang nagse-select ng branch or payment.
7. Screenshot Every Important Page
Screenshot mo ang branch, date, time, reference number, and payment confirmation.
8. Check During Off-Peak Hours
Kung mabagal ang website, try checking early morning or late evening. Minsan mas mabilis mag-load kapag hindi sabay-sabay ang users.
Common Mistakes sa NBI Appointment Online
1. Hindi Na-Save ang Reference Number
Ito ang pinaka-common mistake. Without reference number, mahirap i-track ang payment and appointment.
2. Mali ang Branch na Napili
Double-check branch location bago magbayad. Huwag magmadali sa pag-click.
3. Mali ang Date or Time
Make sure available ka sa selected schedule. Kung may pasok ka, travel, or ibang appointment, pumili ng mas safe na date.
4. Nagbayad Pero Walang Screenshot
Always save payment proof. Kung may system delay, ito ang magiging proof mo.
5. Hindi Match ang Valid ID sa Application
Kung iba ang name format sa valid ID mo, puwede kang ma-delay. Bisitahin ang NBI Clearance Requirements para maicheck kung ano ang mga valid ID’s para sa NBI Clearance at mga Requirements.
6. Late Dumating sa Branch
Kahit may appointment ka, mas okay pa rin dumating early. May verification and pila pa rin sa branch.
What to Bring on Your NBI Appointment Day
Dalhin ang mga ito:
- Valid government-issued ID
- Extra valid ID, if available
- Reference number
- Payment receipt
- Appointment screenshot or printed copy
- First-time job seeker documents, if applicable
- Old NBI Clearance, if renewal
- Phone with screenshots
- Ballpen, just in case
Kung first-time job seeker ka, dalhin ang barangay certification and oath of undertaking if required for your free clearance benefit.
What If Wala Nang Available Slot?
Kung wala kang makitang available slot:
- Check another branch
- Try another date
- Refresh after some time
- Check during off-peak hours
- Try nearby cities or satellite offices
- Avoid peak deadline periods
- Book earlier next time
Tip:
Kung urgent talaga, prioritize availability over distance. Mas okay na bumiyahe nang kaunti kaysa ma-late sa employer deadline.
What If Hindi Ka Makapunta sa Appointment Date?
Kung hindi ka makakapunta sa selected date, check your NBI account kung may option to adjust or make another transaction. Policies and system behavior may vary, so always check your actual account dashboard.
Kung paid na ang transaction, huwag agad gumawa ng panibagong payment unless sure ka sa next step. Save your reference number and ask assistance if needed.
What If Pending Pa Rin ang Payment?
Kung pending pa rin payment mo after paying:
- Huwag muna magbayad ulit
- Check payment receipt
- Confirm reference number
- Wait for posting
- Screenshot your payment proof
- Contact payment channel if needed
- Ask NBI assistance if unresolved
Payment posting is not always instant, so keep proof before taking another action.
FAQs About NBI Appointment Online 2026
Conclusion
Conclusion
Ang pagkuha ng NBI appointment online ay importanteng part ng NBI Clearance application. Dito mo pipiliin ang branch, date, time slot, and payment method. Kapag maayos mong nagawa ito, mas smooth ang branch visit mo dahil ready na ang reference number, payment proof, and appointment details mo.
Para maiwasan ang abala, siguraduhin na tama ang personal information mo, valid ang ID na dadalhin mo, saved ang reference number, and may screenshot or printed copy ka ng appointment. Kung urgent ang clearance mo, check multiple branches and book early para may allowance ka kung magkaroon ng HIT or system delay.
Related Guides:
- How to Apply for NBI Clearance Online 2026
- NBI Clearance Requirements 2026
- How to Pay NBI Clearance Using GCash
- NBI Clearance HIT Status
- Valid IDs for NBI Clearance
- NBI Clearance Renewal Online 2026