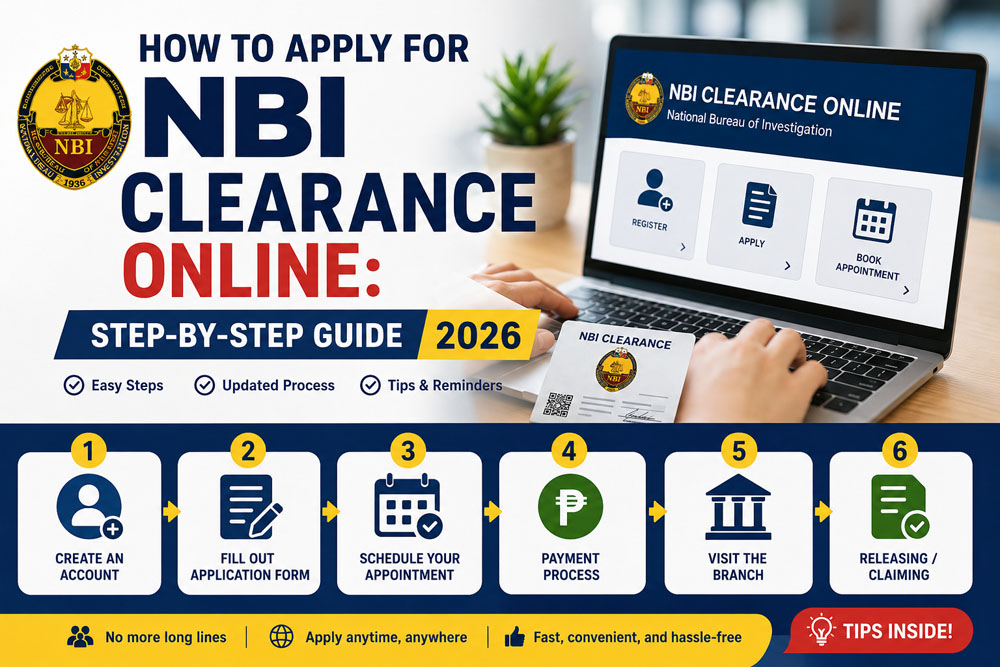
How to Apply for NBI Clearance Online: Step-by-Step Guide 2026
Kung kailangan mo ng NBI Clearance para sa trabaho, travel, visa, government transaction, business requirement, o iba pang legal purpose, good news dahil puwede mo nang simulan ang application online. Hindi mo na kailangang pumunta agad sa NBI branch nang walang appointment, dahil sa NBI Clearance Online system, puwede kang gumawa ng account, mag-fill out ng information, pumili ng schedule, magbayad, at pumunta na lang sa branch para sa biometrics at verification.
Pero kahit online na ang unang part ng process, maraming applicants pa rin ang nalilito. May iba na mali ang name format, hindi alam kung saan makikita ang reference number, hindi sure kung paano magbayad, o kinakabahan kapag lumabas ang HIT status.
Sa guide na ito, tuturuan ka namin kung paano mag-apply ng NBI Clearance Online in 2026, step by step, gamit ang simple at practical na Taglish explanation.
Important note: Ang ClearanceGuidePH.com ay independent guide website lamang. Hindi ito official website ng National Bureau of Investigation. Para sa final instructions, schedules, fees, and announcements, always check the official NBI website or official NBI Clearance portal. The official NBI website lists an “Apply NBI Clearance Online” option and also provides Citizen’s Charter and clearance-related pages.
Quick Answer: Paano Mag-Apply ng NBI Clearance Online?
Para mag-apply ng NBI Clearance Online, kailangan mong gumawa o mag-log in sa iyong NBI online account, kumpletuhin ang personal information, pumili ng branch, date, at time ng appointment, magbayad gamit ang available payment option, then pumunta sa selected NBI branch para sa biometrics, photo capture, data checking, and releasing.
Simple version ng process:
- Gumawa ng NBI online account
- I-fill out ang personal information
- Pumili ng application purpose
- Pumili ng NBI branch
- Mag-schedule ng appointment
- Kunin ang reference number
- Magbayad ng fee
- Pumunta sa branch on appointment date
- Magpa-biometrics and photo capture
- I-claim ang clearance kung walang HIT
Maaari kang pumunta sa link na ito para gumawa ng sariling account. Pindutin lang ang button.
What Is NBI Clearance?
Ang NBI Clearance ay official document na ini-issue ng National Bureau of Investigation. Ginagamit ito para makita kung ang isang tao ay may record o may kapangalan/possible match sa NBI database.
Karaniwan itong hinihingi sa:
- Job application
- Overseas employment
- Visa application
- Travel abroad
- Business requirements
- Government transactions
- School or internship requirements
- Legal documentation
Hindi ito ordinary ID lang. Isa itong clearance document na madalas required kapag gusto ng employer, agency, embassy, or government office na ma-verify ang background ng applicant.
Sino ang Kailangan ng NBI Clearance?
Kadalasan, kailangan mo ng NBI Clearance kung ikaw ay:
- Mag-a-apply ng trabaho
- Fresh graduate or first-time job seeker
- OFW applicant
- Mag-a-apply ng visa
- Mag-aasikaso ng business permit
- Kailangan ng government requirement
- Nagre-renew ng old NBI Clearance
- Kailangan ng proof for legal or official transaction
Kung employment ang purpose mo, siguraduhin na tama ang purpose na pipiliin mo sa application. Kung first-time job seeker ka naman, tingnan kung qualified ka sa free government document benefit under RA 11261.
NBI Clearance Online Requirements 2026
Bago ka mag-start ng online application, ihanda muna ang mga ito.
1. Active Email Address
Kailangan mo ng working email address dahil dito naka-link ang NBI account mo. Dapat kaya mong buksan ang email mo anytime dahil magagamit ito sa login, password reset, at possible verification.
Tip: Huwag gumamit ng email na hindi mo na naa-access. Maraming applicant ang nagkakaproblema dahil nakalimutan na nila ang email na ginamit nila dati.
2. Active Mobile Number
Gamitin ang personal mobile number mo. Kung possible, gamitin ang number na matagal mo nang gamit para hindi ka mahirapan sa future verification or account recovery.
3. Valid ID
Magdala ng valid government-issued ID. Mas safe kung may dala kang dalawang valid IDs, lalo na kung first-time applicant ka.
Common IDs na puwedeng ihanda:
- Passport
- Driver’s License
- UMID
- SSS ID
- PhilHealth ID
- PRC ID
- Postal ID
- National ID or ePhilID
- Voter’s ID or Voter’s Certification
- Senior Citizen ID
- PWD ID
- School ID, if accepted by the branch
Kung gusto mo makita ang lahat ng pwedeng valid IDs, maaari mong i-visit ang List of Valid IDs sa Pilipinas.
4. Personal Information
Ihanda ang complete personal details mo:
- Full name
- Birthdate
- Birthplace
- Gender
- Civil status
- Complete address
- Citizenship
- Mobile number
- Parent details, if required
Make sure na tugma ang details mo sa valid ID mo. Kung mali ang spelling ng pangalan, birthday, or middle name, puwedeng magkaroon ng delay.
5. Payment Method
Maghanda ng payment option. Depending sa available sa portal, puwedeng may GCash, Maya, 7-Eleven, Bayad Center, ECPay, online banking, or other payment partners.
Kung hindi ka pa nakakapag bayad ng NBI Clearance gamit ang Gcash, maaari mo ring basahin ang how to pay NBI Clearance Using Gcash.
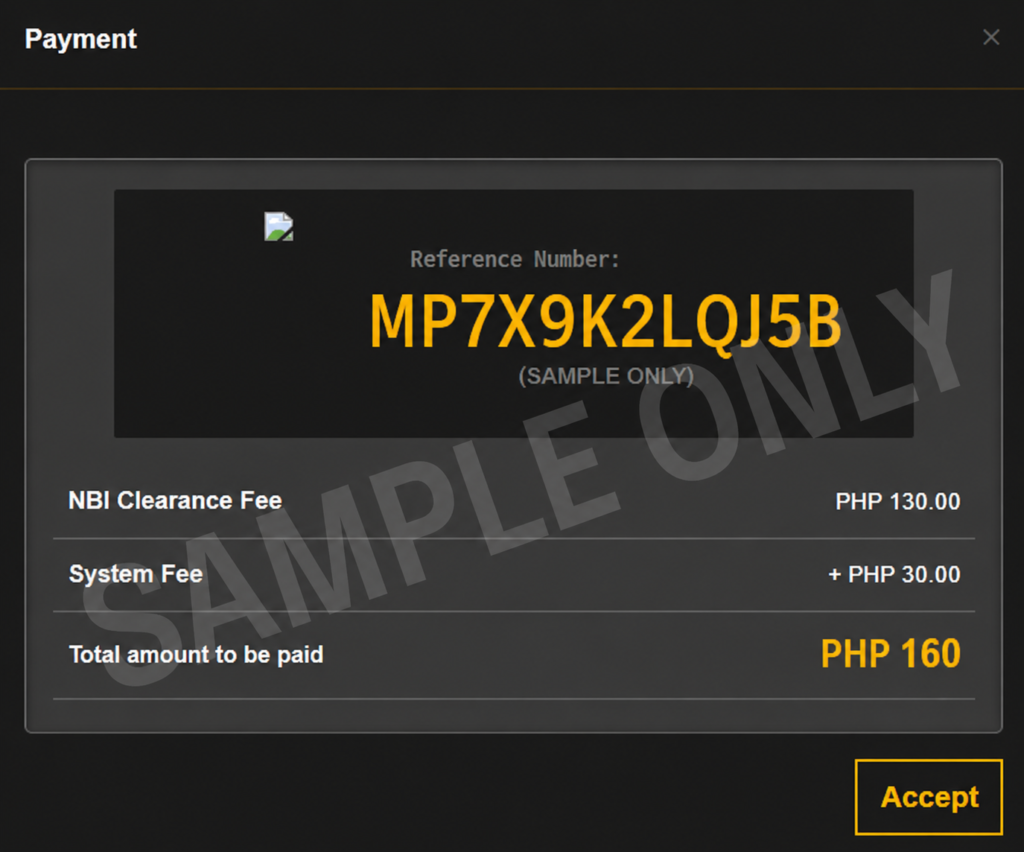
Official NBI mailed clearance guidance references a clearance fee of ₱130, but online applicants should always follow the final amount shown in the official portal because payment and service charges may vary.
Step-by-Step Guide: How to Apply for NBI Clearance Online 2026
Step 1: Pumunta sa Official NBI Clearance Online Portal
Unang step ay pumunta sa official NBI Clearance Online portal. Huwag basta-basta mag-click ng random links sa Facebook comments, ads, or unknown websites.
Important: Always check kung official NBI-related website ang binubuksan mo bago ka mag-enter ng personal information.
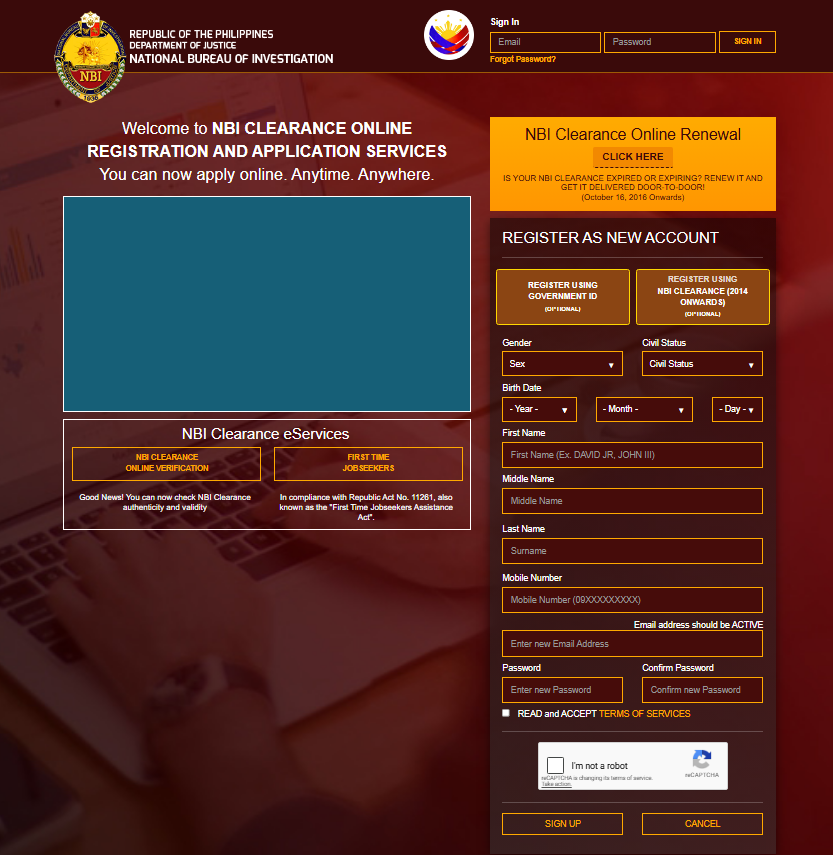
Step 2: Gumawa ng NBI Online Account
Kung first-time applicant ka, kailangan mong gumawa ng account. Usually, hihingin ang basic details tulad ng name, birthday, email, mobile number, and password.
Kapag tinanong kung mayroon kang previous NBI Clearance issued from past years, sagutin ito based sa actual record mo. Kung first time mo talaga, piliin ang option for new applicant.
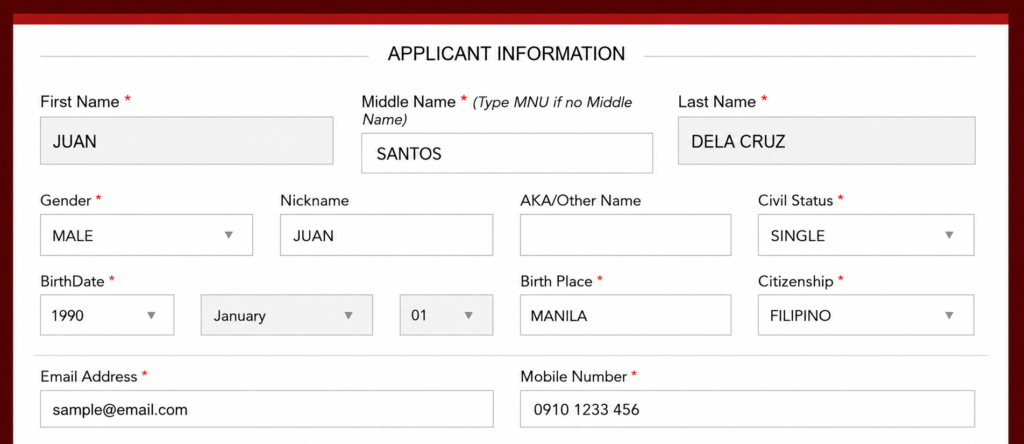
Important Name Format Tip
Gamitin ang full name mo kung paano ito lumalabas sa valid ID.
Example:
Correct:
Juan Santos Dela Cruz
Avoid:
Juan S. Cruz
Kung full middle name ang nasa ID mo, mas okay na full middle name din ang gamitin sa application para consistent.
Step 3: Mag-Log In sa Iyong NBI Account
Pagkatapos gumawa ng account, mag-log in gamit ang registered email and password mo.
Kung nakalimutan mo ang password, gamitin ang forgot password option. Huwag agad gumawa ng panibagong account kung hindi kailangan, dahil baka magdoble ang information mo at lalo kang malito.
Practical Tip:
I-save ang email and password sa secure notes mo. Maraming applicant ang bumabalik sa branch or gumagawa ng bagong account dahil hindi na nila maalala ang login details.
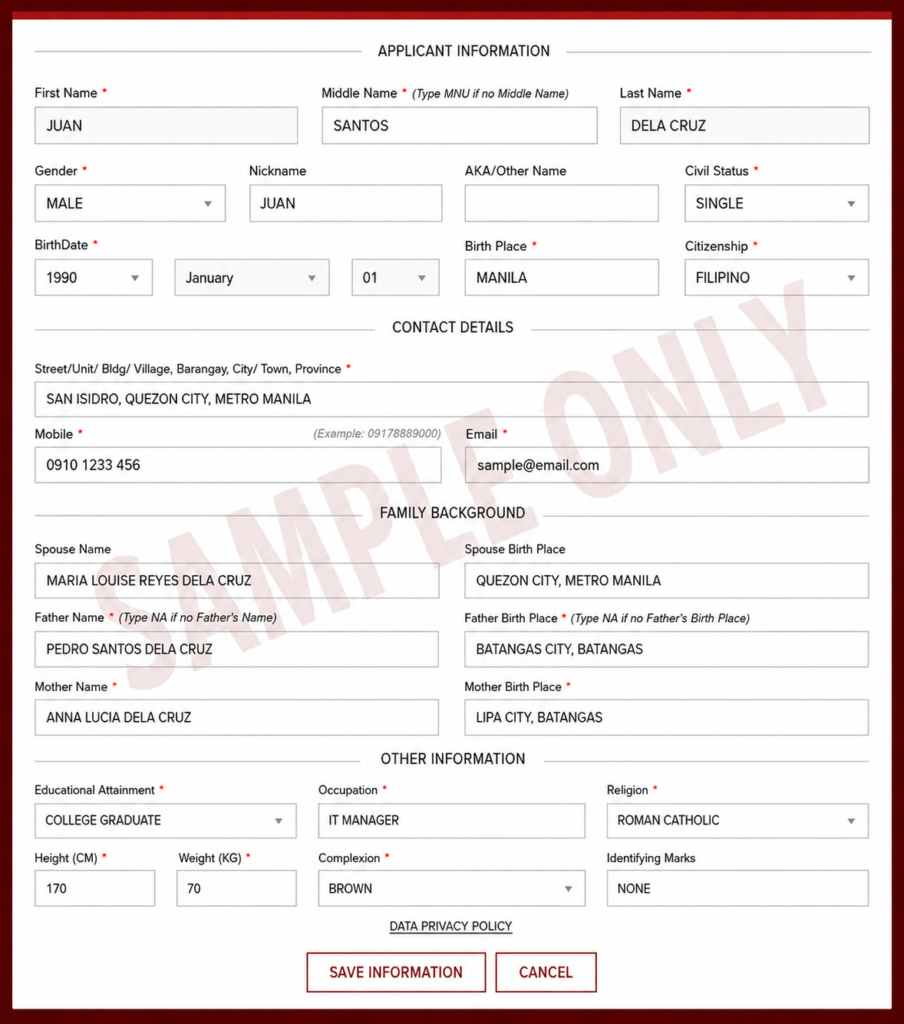
Step 4: I-Fill Out ang Applicant Information
Pag naka-log in ka na, kumpletuhin ang applicant information. Dito pinaka-importante ang accuracy.
Double-check ang:
- First name
- Middle name
- Last name
- Birthday
- Birthplace
- Gender
- Civil status
- Address
- Contact number
- Parent details
Huwag madaliin ang part na ito. Kahit isang maling letter sa name or wrong birthday, puwedeng maging issue during verification.
Step 5: Piliin ang Application Purpose
Next, pipili ka ng purpose ng NBI Clearance mo. Piliin ang purpose na pinaka-akma sa transaction mo.
Common purposes:
- Local employment
- Overseas employment
- Travel abroad
- Visa application
- Business requirement
- School requirement
- Government transaction
- Other legal purpose
Kung for job application, piliin ang employment-related option na applicable sa iyo.
First-Time Job Seeker Note
Kung first-time job seeker ka, puwede kang ma-cover ng Republic Act No. 11261, also known as the First Time Jobseekers Assistance Act. This law waives certain government fees for qualified first-time jobseekers, and the covered documents include NBI Clearance.
Step 6: Pumili ng NBI Branch
Pagkatapos ma-complete ang details, pipili ka ng branch kung saan mo gustong pumunta for processing.
Piliin ang branch na:
- Malapit sa bahay or work mo
- Madaling puntahan
- May available appointment slot
- Hindi masyadong hassle ang biyahe
- Kaya mong puntahan sa selected schedule
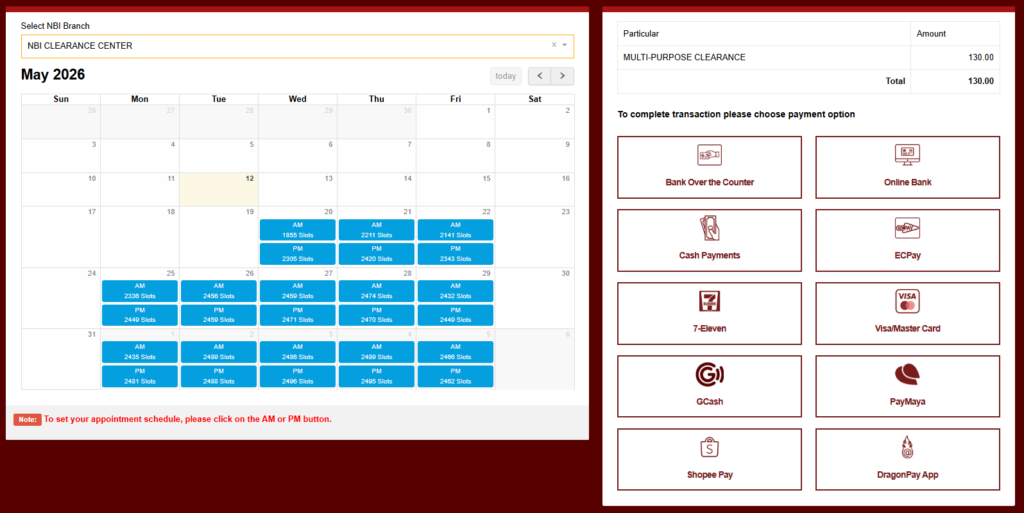
Step 7: Pumili ng Appointment Date and Time
Pag nakapili ka na ng branch, pipili ka naman ng date and time slot. Usually, may morning and afternoon options depende sa available schedule.
Piliin ang date na sure kang makakapunta ka. Kung may pasok ka or may ibang important appointment, huwag kang pumili ng alanganing schedule.
Pro Tip:
Kung gusto mong matapos nang mas maaga, mas okay ang morning schedule. Pero depende pa rin ito sa dami ng tao, system status, and branch process
Step 8: Kunin ang Reference Number
Pagkatapos pumili ng appointment and payment option, magge-generate ang system ng reference number.
Very important ito.
Kailangan mo ang reference number para:
- Magbayad ng NBI Clearance fee
- Ma-track ang transaction
- Ma-confirm ang payment
- Maipakita sa branch if needed
Huwag magbayad kung hindi mo na-save ang reference number.
Step 9: Magbayad ng NBI Clearance Fee
Pag may reference number ka na, puwede ka nang magbayad gamit ang available payment channel na pinili mo.
Possible payment options may include:
- GCash
- Maya
- 7-Eleven CLiQQ
- Bayad Center
- ECPay partners
- Online banking
- Other payment channels shown in the portal
Pagkatapos magbayad, i-save agad ang proof of payment.
Kung GCash or Maya ang ginamit mo, screenshot ang successful payment receipt. Kung 7-Eleven or Bayad Center, itago ang printed receipt.
Important:
Huwag magbayad ulit agad kung hindi pa nagre-reflect ang payment. Minsan may delay sa posting.
Step 10: I-Check ang Payment Status
After payment, bumalik sa NBI account mo and check kung updated na ang transaction status.
Possible status:
- Pending
- Paid
- Processing
- Confirmed, depending on system display
Kung pending pa rin, wait muna. Kung matagal pa rin at sure kang paid na, keep your receipt and contact the payment channel or ask help from NBI support/branch.
Maaari mo ring basahin ang article na Bakit Hindi Nagre-reflect ang Payment mo at pending parin ang status.
Step 11: I-Save or I-Print ang Appointment Details
Before appointment day, i-save ang appointment confirmation. Mas safe kung may printed copy ka, pero okay din na may screenshots ka sa phone.
Bring these:
- Valid ID
- Extra valid ID, if available
- Appointment reference number
- Proof of payment
- Printed appointment slip, if available
- Barangay certification and oath, if first-time job seeker
- Old NBI Clearance, if renewal
- Phone with screenshots
Practical Tip:
I-screenshot ang appointment page, reference number, payment receipt, and transaction status. Kapag mahina ang signal sa branch, may offline copy ka pa rin
Step 12: Pumunta sa NBI Branch on Appointment Day
Sa appointment day mo, pumunta sa selected NBI branch. Mas okay kung maaga ka, lalo na kung morning schedule.
Usually, ito ang mangyayari sa branch:
- I-check ang appointment or reference number
- I-check ang valid ID
- Photo capture
- Fingerprint biometrics
- Data verification
- Releasing or HIT instruction
Magsuot ng maayos dahil kukunan ka ng photo. Hindi kailangang formal na formal, pero dapat presentable.
Step 13: Hintayin ang Result ng Verification
Pagkatapos ng biometrics and photo capture, iche-check ang record mo.
2 common result:
2 Common Result:
- No HIT – Kung No HIT, puwedeng ma-release ang clearance mo on the same day, depende sa branch, system, and volume ng applicants.
- With HIT – Kung may HIT, ibig sabihin kailangan ng additional verification. Hindi ibig sabihin nito na may criminal case ka agad. Minsan may kapangalan ka lang or may similar record na kailangang i-check manually.
Kung may HIT, bibigyan ka ng instruction kung kailan babalik or paano mag-follow up.
What Is NBI HIT?
Ang NBI HIT ay status kung saan may possible match ang name or details mo sa NBI database. Common ito lalo na kung common ang pangalan mo.
Possible reasons:
- May kapangalan ka
- Similar spelling ang name mo sa ibang person
- Common Filipino name
- May previous record na kailangang i-verify
- Kailangan ng manual checking
Huwag agad kabahan. Maraming applicants ang nagkakaroon ng HIT kahit wala naman silang kaso.
Para hindi ka lalo matakot, basahin ang NBI Clearance HIT Meaning para mas maintindihan mo pa.
NBI Clearance for First-Time Job Seekers
Kung first time mong maghahanap ng trabaho, possible na qualified ka sa free NBI Clearance under RA 11261. The law covers several pre-employment documents for qualified first-time jobseekers, including NBI Clearance, police clearance, barangay clearance, and other government documents required for employment.
Usually, kailangan mong ihanda ang:
- Barangay Certification as first-time job seeker
- Oath of Undertaking
- Valid ID
- Appointment details
- Other documents required by the branch
Important:
The benefit is usually for qualified first-time jobseekers and may be availed only under the conditions provided by law. Confirm with your barangay and selected NBI branch before appointment.
Common Mistakes sa NBI Clearance Online Application
1. Mali ang Website na Binuksan
Maraming unofficial pages online. Always check kung official NBI-related portal ang ginagamit mo before entering personal details.
2. Mali ang Name Format
Kung iba ang format ng name mo sa valid ID, puwedeng magkaroon ng issue. Gamitin ang full legal name mo.
3. Wrong Birthday
Double-check month, day, and year. Minsan ang mali lang ay birthday, pero malaking abala na sa verification.
4. Hindi Na-Save ang Reference Number
Reference number ang kailangan sa payment. Kung hindi mo ito na-save, mahihirapan kang i-confirm ang transaction.
5. Walang Proof of Payment
Always save or print your receipt. Kapag may payment issue, ito ang proof mo.
6. Late Dumating sa Appointment
Mas okay kung maaga ka. Kahit may appointment, may process pa rin sa branch.
7. Umaasang Same-Day Release Kahit May HIT
Kung may HIT, expect na may additional waiting time. Huwag mag-apply last minute kung may deadline ka.
What to Bring on Your NBI Appointment Day
Dalhin ang mga ito:
- Valid ID
- Extra valid ID
- Appointment details
- Reference number
- Payment receipt
- Printed appointment slip, if available
- First-time job seeker documents, if applicable
- Old NBI Clearance, if renewal
- Phone with screenshots
- Ballpen, just in case
Tip:
Ilagay lahat sa isang envelope para hindi ka hanap nang hanap sa branch.
What If Pending ang Payment?
Kung pending pa rin ang payment status mo:
- Check kung tama ang reference number
- Tingnan kung nabawasan ang wallet/bank account mo
- Save payment receipt
- Wait for posting
- Contact payment provider if needed
- Ask assistance from NBI if hindi pa rin updated
Huwag agad magbayad ulit unless sure kang failed ang first transaction.
What If Hindi Gumagana ang NBI Website?
Kung slow or ayaw mag-load ang website:
- Refresh the page
- Try another browser
- Clear cache
- Use stable internet
- Try off-peak hours
- Avoid using VPN
- Try another device
- Wait if under maintenance ang system
Huwag paulit-ulit gumawa ng account. Mas lalo kang malilito kung maraming account na may similar details.
You can visit NBI Clearance Online if the portal is not working, and you can also read how you can start processing your NBI clearance step-by-step.
FAQs About NBI Clearance Online 2026
Conclusion
Ang pag-apply ng NBI Clearance Online in 2026 ay mas madali kung prepared ka bago ka magsimula. Kailangan mo lang ng active email, mobile number, valid ID, correct personal information, appointment schedule, reference number, and proof of payment.
Pinaka-importante: huwag madaliin ang form. Siguraduhin na tama ang name, birthday, address, and purpose. I-save lahat ng screenshots, especially reference number and payment receipt. Kung may HIT, huwag kabahan agad dahil common ito at kailangan lang ng additional verification.